
每天喝上一杯契合自身状况的养生茶饮,或许相较于价格高昂的保健品而言,更能够以温和的方式调养身体,然而要是茶选得不对,那么也有可能会产生与预期相反的结果。
认识养生茶饮
养生茶饮可不是那种单纯的“把茶叶和水混合在一起”,它是以中医的理论作为地基,把有着药用特质的食材,跟茶叶或者草本植物,进行科学的搭配组合而成的日常饮用的饮品。
其关键所在是,经由长期地饮用,并且适度地饮用,凭借食材所具有的偏性,进而展开调节人体平衡的动作,最终达成增强自身体质,以及预防疾病这样的目标。
与普通茶饮不同,养生茶更强调食材的“药食同源”属性。
例如红枣补气、菊花清热,这些既是食物也是药物。
当下的人们,生活的节奏可谓是快速得很,亚健康这种状态呢,那是相当普遍的,而一杯能够对上症状的那种养生茶,便成为了便捷的如同“健康补给站”一样的存在。
制作的核心要点
制作一杯有效的养生茶,关键在“选材”与“冲泡”。
首当其冲的是,要依据个人的体质去挑选基底,比如说,倘若体质偏向于寒,那就选择具有温性的红茶,要是体质偏向于热,那就挑选具备凉性的绿茶。
随后加入针对性的辅料,如用眼多可选枸杞,消化不良可选山楂。
冲泡细节同样影响功效。
似那种富含着维生素的柠檬、桂花,应当采用80℃上下的水温进行短时间浸泡,以此来防止破坏其中的营养成分。
对于那些需要将有效成分析出来的根茎类药材,像是当归这种,还有黄芪这类,是被建议进行煮沸几分钟操作的。
泡好后,不宜久放,以免滋生细菌或营养流失。
主要功效与适用人群
养生茶的功效源于其成分的天然药理作用。
绿茶,其富含茶多酚,可有效清除自由基,能帮助办公室人群抵抗辐射以及抗氧化;茶饮,含有红枣和桂圆,可为气血不足的女性补充能量,还能改善气色。
不同人群的养生重点各异,茶饮选择也应不同。
适合长期熬夜的人饮用那种含有决明子以及菊花的茶来达到清肝明目的效果;中老年人经常饮用山楂与普洱茶,对消食解腻以及调节血脂是有帮助的;在运动之后补充水分的时候,加入一点盐的柠檬茶能够更快地恢复体力。
科学的搭配法则
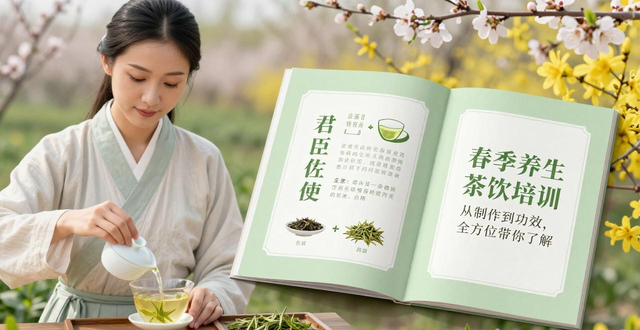
养生茶的搭配讲究“君臣佐使”,即分清主次。
通常把茶叶或者主要草本当作“君”,像是主攻睡眠的酸枣仁,依靠辅助食材作为“臣”,比如安神的茯苓,一同强化核心功效。
同时,必须注意食材间的“相生相克”。
比如,典型的“枸杞菊花茶”,菊花的性质略微偏寒,能够清除肝部的火气,枸杞的性质平和,能够滋养肾脏的阴液,一方进行清除,一方加以补益,二者相互辅助成就功效。
要留意了,体质呈现虚寒状况的人,应当防止长时间单独去饮用那些属于寒性范畴的食材,不妨搭配一两片生姜用来平衡茶的性质,由此防止出现肠胃不舒服的情况。
产品的创新趋势
当前市场上的养生茶饮已不再局限于传统药罐子形象。
针对年轻人“随手养生”的需求予以满足,创新在配方方面得以体现,创新在形态方面得以体现,创新在包装等等诸多方面得以体现。
品牌着手联合现代营养学,研制出针对“熬夜修复”这一特定场景的复合配方产品,还开发出对着“控卡代餐”这类具体情境的复合配方产品。
将保留花果原本色泽与风味这一目的,在技术层面上,采用的是冻干锁鲜技术;而冷萃工艺达成的效果是,降低了茶汤的苦涩感,进而让茶汤变得更易于入口。
产品的包装之处,同样朝着便于携带以及具备环保特性的方向发展,像是将其设计成为独立的三角形状的茶包,又或者是瓶装的冷萃液,以此让身处快节奏生活当中的都市人群,能够在任何时间以及任何地点开启养生的模式。
市场的未来前景
随健康中国战略推进,伴随人口老龄化加剧,养生茶饮市场需求,正从“可选”转变为“刚需”。
依照行业数据所展示的情况来看,国内养生茶所占的市场规模,其年均增长率始终不间断地维持在两位数以上,尤其是属于年轻范畴的消费群体,在整体中的占比明显有一种向上提升的态势,并且他们相对于其他群体而言,更加心甘情愿地为那种被称为“朋克养生”的行为支付费用。
社交媒体兴起,给市场注入活力,网红茶饮具打卡效应,KOL进行健康知识分享,持续教育且扩展消费群体。
未来,能够供应个性化定制的产品,能够具备明确功能性的产品,能够拥有良好口味的产品,将会在激烈的市场竞争里占据主导地位。
在最后,想问一问大家,你于最近这段时间,最想要凭借喝茶这种方式去改善身体方面哪一个细微的问题呢,又或者,你最为期望在市面上能够出现一款怎样的具备创新特质的养生茶呢?
欢迎在评论区留言分享你的“养生愿望单”。
Comments NOTHING